Tired of juggling complex passwords for every server you manage, constantly worried about brute-force attacks? If you’re looking to boost your digital security and streamline your workflow, mastering Generating SSH Key Pairs: Step-by-Step Guides is your essential next step. It's the gold standard for secure, passwordless remote access, empowering you to connect to servers with unmatched confidence and ease.
This guide will walk you through the process of creating SSH (Secure Shell) key pairs, transforming how you interact with your remote systems. No more remembering intricate alphanumeric strings; just secure, one-time setup for smooth, authenticated connections every time.
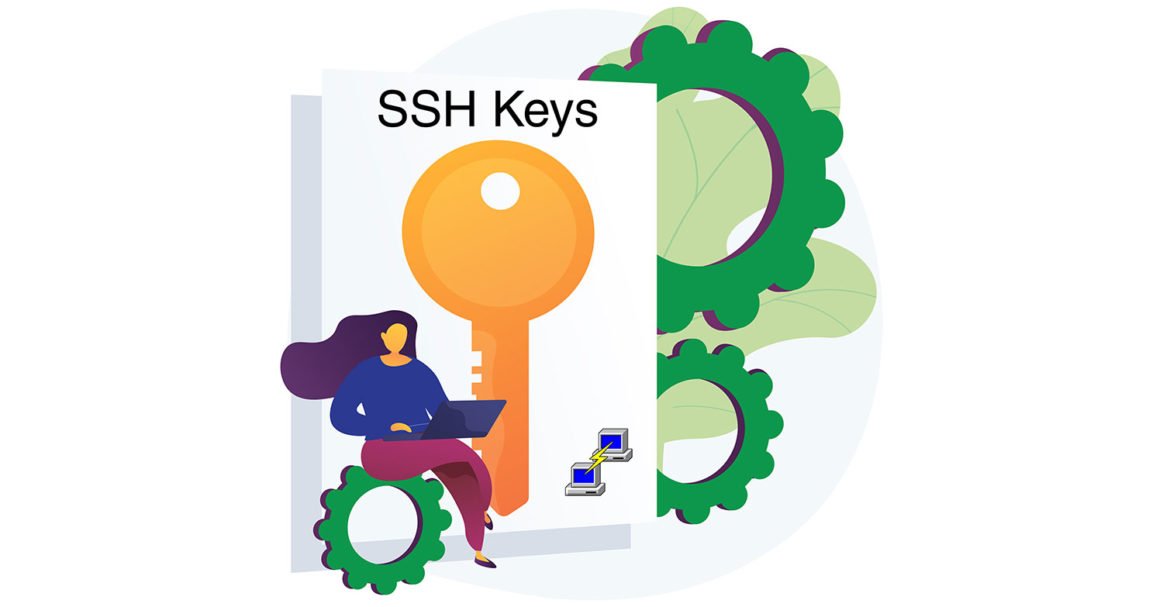
At a Glance: What You'll Achieve
- Ditch Passwords for Good: Replace vulnerable passwords with cryptographic keys for remote server authentication.
- Boost Security: Learn why SSH keys are inherently more secure and less prone to common attack vectors.
- Master
ssh-keygen: Get hands-on instructions for using thessh-keygencommand on macOS and Linux. - Choose the Right Algorithm: Understand the differences and make informed decisions between ED25519 (recommended) and RSA.
- Customize Your Keys: Explore options for key length, comments, and file names.
- Seamless Deployment: Discover how to easily place your public key on remote servers and connect.
- Best Practices: Grasp essential security tips for managing your precious SSH keys.
Why Ditch Passwords? The Unmatched Power of SSH Keys
In today's digital landscape, the humble password is often the weakest link in your security chain. Easy to guess, susceptible to dictionary attacks, and frequently reused, they're a constant vulnerability. Enter SSH key-based authentication: a cryptographic handshake that's virtually impossible to crack through brute force.
Instead of a shared secret (like a password), SSH keys operate on a public-private key pair system. Think of it like a digital lock and key:
- Your Private Key: This is your unique "key." You keep it secret, safe, and protected on your local computer. It never leaves your machine.
- The Public Key: This is your "lock." You can share it freely and place it on any remote server you want to access.
When you try to connect, your local machine presents your private key to the server. The server then checks if it has the matching public key. If they align, access is granted—without a single password prompt. This isn't just about convenience; it’s about a dramatic leap in security, making your remote access resilient against common threats and much more efficient for automated tasks.
Understanding the Players: Public vs. Private Keys
Before we dive into generating keys, let's solidify the roles of these two critical components. Their distinct functions are the foundation of SSH's robust security.
The Private Key: Your Secret Identity
The private key is the core of your SSH identity. It's a highly sensitive file that must remain absolutely secret and securely stored on your local machine. Think of it as the ultimate password – one you never share. If an attacker gains access to your private key, they could potentially impersonate you on any server where your corresponding public key is installed.
- Location: Typically stored in
~/.ssh/(e.g.,~/.ssh/id_ed25519). - Permissions: Crucially, its file permissions are extremely restrictive, typically
600(read/write only by the owner), preventing other users on your local system from accessing it.
The Public Key: The Shared Validator
The public key, on the other hand, is designed to be shared. You place it on remote servers within a special file called authorized_keys. When a connection attempt is made, the server uses this public key to verify that the connecting private key is legitimate.
- Location: Typically derived from your private key and saved with a
.pubextension (e.g.,~/.ssh/id_ed25519.pub). - Permissions: Less restrictive, as it's meant to be shared. However, the
authorized_keysfile on the server should still have secure permissions.
The magic happens when these two mathematically linked keys perform a cryptographic dance. The server challenges your client, your client responds using your private key, and the server validates that response using its public key. No passwords exchanged, just undeniable proof of identity.
Choosing Your Weapon: SSH Key Algorithms Explained
Not all SSH keys are created equal. The strength and security of your key pair depend heavily on the cryptographic algorithm used to generate it. Here's a quick rundown of the most common types:
1. ED25519: The Modern Champion (Recommended)
- Algorithm Type: Elliptic-curve cryptography (ECC).
- Why it's Great: ED25519 is the modern, highly secure, and recommended choice. It offers equivalent or superior security to RSA keys but with significantly shorter key lengths, leading to faster generation, faster authentication, and resistance to certain advanced attacks. It's concise, efficient, and robust.
- Key Length: Typically 256 bits, but don't let the smaller number fool you; ECC bits are not directly comparable to RSA bits. A 256-bit ED25519 key offers security comparable to a 3072-bit or even 4096-bit RSA key.
If your OpenSSH client and server are relatively up-to-date (OpenSSH 7.8+), ED25519 is the default and preferred option.
2. RSA: The Reliable Workhorse (Use with Caution)
- Algorithm Type: Rivest–Shamir–Adleman (RSA).
- Why it's Common: RSA has been the traditional go-to for many years and enjoys broad compatibility across systems.
- Security Concerns: While still viable, RSA's security relies heavily on key length. Older, shorter keys (like the default 2048-bit) are becoming less secure against advanced attacks.
- Recommendation: If you must use RSA (due to legacy systems or specific requirements), always generate keys with a length of at least 4096 bits. The default
ssh-keygenlength is often 2048 bits, which you should override.
3. DSA: The One to Avoid
- Algorithm Type: Digital Signature Algorithm (DSA).
- Why it's Deprecated: DSA is an older algorithm with a fixed 1024-bit key length, making it insecure by modern standards. It's deprecated in recent OpenSSH versions and should be avoided entirely for new keys.
The Takeaway: For new key pairs, always choose ED25519 unless you have a specific, compelling reason (like a legacy system that only supports RSA) to use RSA 4096.
Your Go-To Tool: The ssh-keygen Command
The core utility for generating SSH key pairs is the ssh-keygen command. It's a standard part of the OpenSSH suite and is readily available on virtually all Linux and macOS systems. You'll execute this command directly from your terminal or command prompt.
Let's dive into the practical steps.
Step-by-Step: Generating Your Recommended ED25519 Key Pair
This is the most straightforward and secure method for generating new keys. Follow these steps on your local machine (macOS or Linux).
1. Open Your Terminal
Find your terminal application. On macOS, it's usually Terminal.app in /Applications/Utilities. On Linux, you'll find various options like GNOME Terminal, Konsole, xterm, etc., often accessible through your applications menu.
2. Execute the ssh-keygen Command
Type the following command and press Enter:
bash
ssh-keygen -t ed25519 -C "your_email@example.com"
Let's break down those options:
-t ed25519: This is the crucial part that tellsssh-keygento use the modern, highly secure ED25519 algorithm. As mentioned, this is the recommended choice.-C "your_email@example.com": This optional flag adds a comment to your public key. While optional, it's a best practice to include an identifiable string, typically your email address or a brief description, to help you remember the key's purpose later on. Replace"your_email@example.com"with your actual email or a descriptive tag.
3. Respond to the Prompts
After executing the command, you'll see a series of prompts:
Prompt 1: Enter file in which to save the key (~/.ssh/id_ed25519):
By default, ssh-keygen will suggest saving your new private key in your ~/.ssh/ directory, naming it id_ed25519. This is the standard, preferred location and filename.
- Recommendation: Unless you have a specific reason to use a custom name or location (e.g., generating multiple keys for different purposes), simply press
Enterto accept the default.
If you choose a custom filename (e.g.,~/.ssh/my_web_key), the public key will automatically be namedmy_web_key.pub.
Prompt 2: Enter passphrase (empty for no passphrase):
Prompt 3: Enter same passphrase again:
This is where you decide whether to protect your private key with an additional password (a passphrase).
- With a Passphrase (Recommended for Maximum Security): If you enter a passphrase here, your private key will be encrypted on your local disk. This means that even if someone gains unauthorized access to your computer and tries to use your private key, they won't be able to without knowing this passphrase. You'll be prompted for it each time you use the key. A strong passphrase acts as an extra layer of defense.
- Without a Passphrase (For Automation or Convenience): If you press
Entertwice (leaving both prompts empty), your private key will be saved unencrypted. This allows for entirely passwordless authentication, which is excellent for automation scripts (e.g., CI/CD pipelines, automated backups) where human intervention isn't feasible. However, it means anyone who gains access to your private key file can use it immediately.
Choose wisely. For personal interactive use, a passphrase is a strong security measure. For automated systems, omitting it might be a necessity, but you must ensure the private key's storage location is extremely secure.
4. Review the Output
Once you've responded to the prompts, ssh-keygen will generate your keys and display output similar to this:
Generating public/private ed25519 key pair.
Your identification has been saved in /home/username/.ssh/id_ed25519
Your public key has been saved in /home/username/.ssh/id_ed25519.pub
The key fingerprint is:
SHA256:EXAMPLE_FINGERPRINT_STRING_HERE your_email@example.com
The key's randomart image is:
+--[ED25519 256]--+
| .o. |
| .+. . |
| . O + |
| o B = . |
| . * = S . |
| . + + + |
| = + o . |
| o . |
| |
+----[SHA256]-----+
This output confirms that your key pair has been successfully created.
Your Newly Generated Key Files
In your ~/.ssh/ directory, you'll now find two new files:
id_ed25519: Your private key. Keep this file secret and secure! Its permissions should automatically be set to600(read/write by owner only).id_ed25519.pub: Your public key. This is the file you'll copy to remote servers.
You've just completed the most secure way to generate an SSH key pair. Fantastic work!
Step-by-Step: Generating a Robust RSA 4096-bit Key Pair (If You Must)
While ED25519 is our top recommendation, there might be scenarios where you need to use an RSA key, perhaps for compatibility with older systems or specific requirements. If so, it's crucial to generate a strong one.
1. Open Your Terminal
Just like before, start by opening your terminal application.
2. Execute the ssh-keygen Command
This time, we'll specify the RSA algorithm and a longer key length:
bash
ssh-keygen -t rsa -b 4096 -C "your_email@example.com"
Breaking down the options:
-t rsa: Specifies the RSA algorithm.-b 4096: This is vital. It sets the key length to 4096 bits. Never use a key shorter than 4096 bits for new RSA keys. The default (often 2048 bits) is no longer considered sufficiently robust for long-term security.-C "your_email@example.com": Adds a comment to your public key for identification.
3. Respond to the Prompts
The prompts will be similar to the ED25519 generation:
Prompt 1: Enter file in which to save the key (~/.ssh/id_rsa):
- Recommendation: Press
Enterto accept the defaultid_rsafilename and~/.ssh/location.
Prompt 2 & 3: Enter passphrase (empty for no passphrase):
- As discussed, choose whether to protect your private key with a passphrase. For personal use, a passphrase is a good idea.
4. Review the Output
You'll see confirmation that your RSA key pair has been generated, along with its fingerprint and randomart image.
Your RSA Key Files
You'll find id_rsa (your private key) and id_rsa.pub (your public key) in your ~/.ssh/ directory.
Beyond the Defaults: Customizing Your SSH Key Generation
The ssh-keygen command is flexible. You can tailor your key generation process further using additional options. This is particularly useful if you manage multiple keys for different purposes or environments.
1. Changing the Output Filename (-f)
If you want to generate a new key pair but already have id_ed25519 or id_rsa in your ~/.ssh/ directory, ssh-keygen will warn you about overwriting it. To avoid this (and to keep separate keys for different servers or roles), you can specify a custom filename:
bash
ssh-keygen -t ed25519 -f ~/.ssh/my_github_key -C "github_key@example.com"
This command will create:
~/.ssh/my_github_key(private key)~/.ssh/my_github_key.pub(public key)
Remember, if you use a custom filename, you'll need to specify it when connecting to a server, or configure your SSH client to know which key to use for which host. We'll touch on connecting with custom keys shortly.
2. Setting a Passphrase Directly (-P or -N)
For scripting or advanced use cases, you can provide the passphrase directly in the command. However, be extremely cautious with this, as putting a passphrase in your command history can be a security risk.
To generate a key without a passphrase (useful for automation, but less secure):
bash
ssh-keygen -t ed25519 -N "" -f ~/.ssh/automation_key -C "automation_key@example.com"
-N "": Sets an empty passphrase (i.e., no passphrase).- You might also see
-qused with this, which suppresses the output during key generation:ssh-keygen -q -N "" ...
To set a specific passphrase directly (again, use with extreme caution):
bash
ssh-keygen -t ed25519 -N "YourStrongPassphraseHere" -f ~/.ssh/secret_key -C "secret_key@example.com" -N "YourStrongPassphraseHere": Sets the passphrase directly.
General advice: Avoid setting passphrases directly in the command line for manual operations, as it exposes the passphrase in your shell history. It's better to respond to the prompts.
3. Other Useful Flags
-b [bits]: As we saw with RSA, this sets the key encryption level in bits. Only applicable for algorithms like RSA or DSA (though DSA is deprecated). Not used for ED25519, as its bit strength is fixed.-C [comment]: Adds a comment to the public key. We've used this already!
These custom options give you fine-grained control over your SSH key generation, allowing you to create keys perfectly tailored to your specific needs.
Putting Your New Key to Work: Deploying and Connecting
Generating the key pair is only half the battle. The next crucial step is to place your public key on the remote server and then connect using your new private key.
1. Placing Your Public Key on the Remote Server
To allow SSH access using your new key, you need to add the contents of your public key file (id_ed25519.pub or id_rsa.pub) to a special file on the remote server: ~/.ssh/authorized_keys.
The authorized_keys file lives in the ~/.ssh/ directory of the user you want to log in as on the remote server. For example, if you want to log in as ubuntu user, the path would be /home/ubuntu/.ssh/authorized_keys.
The Easy Way: Using ssh-copy-id (Recommended)
The ssh-copy-id command is your best friend for securely and easily copying your public key to a remote server. It handles creating the ~/.ssh directory (if it doesn't exist), setting the correct permissions, and appending your public key to authorized_keys.
bash
ssh-copy-id -i ~/.ssh/id_ed25519.pub user@server_ip_or_hostname
-i ~/.ssh/id_ed25519.pub: Specifies which public key to copy. If you used the defaultid_ed25519.puborid_rsa.puband don't specify-i,ssh-copy-idwill attempt to use your default keys.user@server_ip_or_hostname: Replaceuserwith the username on the remote server (e.g.,ubuntu,root,ec2-user), andserver_ip_or_hostnamewith the server's IP address or domain name.
You'll be prompted for the remote server's password (if password authentication is enabled) or your private key's passphrase if you set one. Once authenticated,ssh-copy-iddoes its magic.
The Manual Way (If ssh-copy-id isn't available or preferred)
If ssh-copy-id isn't an option, you can manually copy your public key.
Step A: Copy the Public Key Content
First, display the content of your public key on your local machine:
bash
cat ~/.ssh/id_ed25519.pub
Copy the entire output (it will look like a long string of characters starting with ssh-ed25519 or ssh-rsa).
Step B: Access the Remote Server (using password or existing key)
You'll need to log into the remote server using an existing method (either its password or another SSH key):
bash
ssh user@server_ip_or_hostname
Step C: Create/Append to authorized_keys
Once logged into the remote server:
- Create the
.sshdirectory if it doesn't exist:
bash
mkdir -p ~/.ssh - Set correct permissions for the
.sshdirectory: This is critical!
bash
chmod 700 ~/.ssh - Append your public key to
authorized_keys:
bash
echo "PASTE_YOUR_PUBLIC_KEY_HERE" >> ~/.ssh/authorized_keys
Replace"PASTE_YOUR_PUBLIC_KEY_HERE"with the entire string you copied in Step A. Make sure to use>>(append) to avoid overwriting existing keys if the file already exists. - Set correct permissions for
authorized_keys: Equally critical!
bash
chmod 600 ~/.ssh/authorized_keys
Important: Strict permissions on~/.sshand~/.ssh/authorized_keysare paramount for security. SSH will refuse to use keys if these permissions are too open.
2. Connecting to the Server Using Your SSH Key
Once your public key is on the remote server, you can connect.
For Default Key Locations (id_ed25519 or id_rsa):
bash
ssh user@server_ip_or_hostname
SSH will automatically look for id_ed25519, id_rsa, and other common key names in your ~/.ssh/ directory. If you set a passphrase, you'll be prompted for it.
For Custom Key Locations/Names:
If you generated a key with a custom filename (e.g., my_github_key), you need to tell SSH which private key to use with the -i flag:
bash
ssh -i ~/.ssh/my_github_key user@server_ip_or_hostname
This command specifies that SSH should use ~/.ssh/my_github_key as your private key for authentication.
And just like that, you're connected! No password, just secure, seamless access.
Navigating Key Security: FAQs and Best Practices
Securing your SSH keys is just as important as generating them correctly. Here are some common questions and essential best practices to keep your connections secure.
Should I Use a Passphrase for My SSH Key?
- For interactive use (connecting manually): Yes, absolutely. A passphrase encrypts your private key on your disk. If your local computer is compromised, an attacker won't be able to use your private key without knowing the passphrase. This is a crucial second layer of defense. SSH agent forwarding can often mitigate the inconvenience of typing the passphrase repeatedly.
- For automation (scripts, CI/CD): Often no, for practical reasons. If an automated process needs to use the key without human interaction, a passphrase would block it. In these cases, it's vital to ensure the system storing the unencrypted private key is extremely secure and isolated.
What If I Lose My Private Key?
If your private key is lost or stolen, it's a significant security incident.
- Immediately remove the corresponding public key from the
~/.ssh/authorized_keysfile on all remote servers where it was deployed. - Generate a brand new SSH key pair (both private and public).
- Deploy the new public key to your remote servers.
- Consider any accounts or systems that might have been compromised and take appropriate action.
Can I Use One Public Key for Multiple Servers?
Yes, absolutely! This is one of the great advantages of SSH keys. You can add the same public key (id_ed25519.pub or id_rsa.pub) to the ~/.ssh/authorized_keys file on as many remote servers as you wish. This allows you to use a single private key on your local machine to access all those servers.
Should I Use Online Services to Create SSH Keys?
Absolutely not. Never use an online service, website, or any third-party tool that requires you to upload or generate your private key online. Your private key should only be generated locally on your trusted machine using ssh-keygen. Generating it online means you're entrusting a third party with your secret key, which defeats the entire purpose of its security.
How Do I Check the Algorithm of an Existing Key?
If you're unsure whether an existing key is ED25519, RSA, or another type, you can easily check using ssh-keygen:
bash
ssh-keygen -l -f /path/to/your/private_key
For example:
bash
ssh-keygen -l -f ~/.ssh/id_ed25519
This will output the key's fingerprint and algorithm type (e.g., 256 SHA256:EXAMPLE_FINGERPRINT ssh-ed25519 (comment)).
Essential Security Best Practices for SSH Keys
- Protect Your Private Key: Ensure its file permissions are
600(-rw-------). Never share your private key file with anyone. - Use Strong Passphrases: If using a passphrase, make it long and complex, ideally like a sentence.
- Backup Your Private Key (Carefully!): If you use a passphrase, you can backup your private key to a secure, encrypted location. Without a passphrase, this becomes very risky. Ensure any backups are highly protected.
- Revoke Compromised Keys: If you suspect a private key has been compromised, revoke its access immediately on all servers by removing its corresponding public key from
authorized_keys. - Regular Audits: Periodically review the
authorized_keysfile on your servers to ensure only legitimate keys are present. - SSH Agent (macOS/Linux): Use an SSH agent to store your decrypted private key in memory temporarily after you've entered its passphrase once. This saves you from re-typing the passphrase for every connection during your session. The agent will manage the private key for you, allowing you to seamlessly connect without repeated prompts. For a more in-depth look at managing your keys efficiently, you might want to explore articles on how to generate SSH keys for advanced tips.
Your Next Secure Step
You've now got the tools and knowledge to confidently generate, secure, and deploy SSH key pairs, making your remote server interactions more secure and efficient. Moving forward, make it a habit to use SSH keys for all your server access. It’s a fundamental step towards better system security and a smoother workflow.
Embrace the convenience and security that SSH keys offer. Your servers (and your future self) will thank you!