In the world of remote access, SSH keys are your digital fingerprint, far more secure and convenient than passwords. You likely use them for basic server logins or GitHub pushes. But what if you could leverage SSH keys and their underlying mechanisms to build intricate, secure tunnels, seamlessly hop across networks, or manage dozens of connections with effortless elegance? This guide dives deep into advanced SSH key concepts and usage, transforming you from a casual user into a master architect of secure, efficient remote access.
Mastering these techniques isn't just about showing off; it's about building robust, resilient, and highly secure infrastructure workflows that save you time and headaches.
At a Glance: Your Toolkit for Advanced SSH Mastery
- SSH Tunnelling (Port Forwarding): Create secure, encrypted channels to access internal services or route traffic safely, perfect for bypassing firewalls or securing unencrypted protocols.
- Jump Hosts (
ProxyJump): Navigate complex network topologies, securely reaching internal servers that are only accessible via a "bastion" host, all in a single command. ~/.ssh/configPower: Centralize and simplify complex SSH commands with host-specific configurations, aliases, and advanced options.- SSH Multiplexing: Reuse existing SSH connections to dramatically speed up subsequent sessions,
scp, andrsyncoperations. - SSH File System (SSHFS): Mount remote directories locally, treating distant files as if they were on your desktop for seamless editing and management.
- Robust Key Management: Employ strategies for passphrase protection, key rotation, and segmented key usage to bolster your security posture.
- Disable Passwords: Enforce key-only authentication on servers for a stronger, more automated security model.
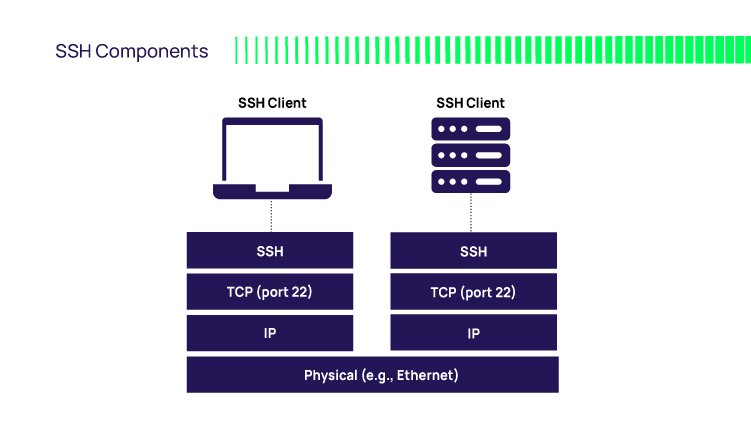
The Unseen Backbone: SSH Keys Refresher
Before we explore the advanced landscape, let's quickly re-establish the core strength of SSH keys. They are cryptographic credentials, a pair of mathematically linked files – a public key and a private key – that provide an ironclad, passwordless method for authenticating to remote systems.
- The Public Key (
.pub): Think of this as a unique, publicly displayed padlock you place on any server you want to access. You can distribute it freely. - The Private Key: This is your secret, unique key that opens that specific padlock. It must remain confidential and secure on your local machine.
When you connect, the remote server uses your public key to "challenge" your local machine. If your private key can successfully answer that challenge, access is granted. This handshake is virtually impossible to crack via brute force, offering superior security and unmatched convenience compared to traditional passwords. SSH keys simplify automation, reduce password fatigue, and integrate seamlessly with cloud platforms and code repositories like GitHub and GitLab.
If you're new to creating them, our guide on How to generate SSH keys walks you through the straightforward process of usingssh-keygento create a new RSA or Ed25519 key pair with a robust passphrase. Once generated, your public key is added to the~/.ssh/authorized_keysfile on the remote system, completing the setup.
Beyond the Basics: Advanced SSH Techniques
Now, let's unlock the true potential of SSH. These techniques turn a simple connection into a versatile tool for networking, security, and productivity.
Unlocking Hidden Passageways: SSH Tunnelling & Port Forwarding
SSH tunnelling, often called port forwarding, transforms your encrypted SSH connection into a secure conduit for transmitting data between network ports. This is incredibly useful for accessing services behind firewalls, encrypting otherwise unencrypted traffic, or simply routing data through a secure channel.
Think of it as creating a private, encrypted tube through the internet, allowing data to flow safely from one point to another without eavesdropping or interference.
- Local Port Forwarding (
-L):
This is the most common type. It forwards traffic from a port on your local machine to a specified port on a remote host, via an intermediate SSH server.
- Scenario: You're on your local machine (A) and want to access a web service (C) deep within a private network, only reachable by an SSH server (B).
- Command:
ssh -L local_port:remote_host:remote_port user@ssh-server - Example:
ssh -L 8080:internal-web-server.private:80 user@jump.example.com - This command tells your local machine to listen on port
8080. Any traffic sent tolocalhost:8080will be securely forwarded throughjump.example.comand then directed tointernal-web-server.privateon port80. It’s like having a direct line to the internal web server from your local browser, all encrypted.
- Remote Port Forwarding (
-R):
The inverse of local forwarding. It opens a port on the remote SSH server and forwards traffic back to a specified port on your local machine or another host.
- Scenario: You have a local web application running on your laptop (A), and you want a colleague or a webhook on a public SSH server (B) to access it.
- Command:
ssh -R remote_port:local_host:local_port user@ssh-server - Example:
ssh -R 9000:localhost:3000 user@public-dev-server.com - Now, anyone who can access
public-dev-server.comcan browse tohttp://public-dev-server.com:9000and their traffic will be securely routed back to your laptop's web app running onlocalhost:3000. This is fantastic for demoing local development work without deploying.
- Dynamic Port Forwarding (
-D) - The SOCKS Proxy:
This creates a SOCKS proxy on your local machine, allowing you to route traffic for multiple destinations through the SSH tunnel. It's often used for secure browsing or bypassing geographical restrictions.
- Scenario: You want all your web traffic (or specific application traffic) to be routed securely through a remote server, making it appear as if you're browsing from that server's location.
- Command:
ssh -D local_socks_port user@ssh-server - Example:
ssh -D 1080 user@secure-proxy-server.com - Once established, configure your browser (or any SOCKS-aware application) to use
localhost:1080as a SOCKS proxy. All its traffic will then traverse the encrypted SSH tunnel, exiting fromsecure-proxy-server.com. This offers a simple way to secure all your network activity through a trusted remote host.
Tunnelling Security Best Practices
While powerful, tunnels can be misused. Always:
- Limit Access: Use firewalls on your SSH server to restrict who can initiate tunnels or what ports they can forward.
AllowUsersandForceCommandinsshd_configare your friends. - Key Authentication: Always, always enforce key-based authentication. Password-based tunnels are highly vulnerable to brute-force attacks.
- Monitor Usage: Regularly check SSH logs on your server for unusual activity. Malicious tunnels can expose internal services or be used as launchpads for further attacks.
The Grand Tour Guide: Navigating with Jump Hosts (Bastion Hosts)
Often, your target server isn't directly exposed to the internet. Instead, it sits behind a "jump host" or "bastion host"—a hardened server that acts as a gateway to your internal network. SSH provides elegant ways to "hop" through these bastions to reach your final destination.
ProxyJump(-JFlag):
Introduced in OpenSSH 7.3,ProxyJumpis the modern, most straightforward way to use a jump host. It tunnels your SSH session directly through the bastion to the internal server in a single, clear command.
- Scenario: You need to connect to
db-server.internalbut can only reach it viabastion.example.com. - Command:
ssh -J user@bastion-host user@internal-server - Example:
ssh -J alice@bastion.example.com alice@db-server.internal - This command first establishes an SSH connection to
bastion.example.comand then, through that connection, opens a second SSH connection todb-server.internal. You get a shell ondb-server.internalseamlessly.
ProxyCommand(Older Alternative):
For older SSH clients or more complex scenarios,ProxyCommandin your~/.ssh/configfile offers similar functionality. It executes an arbitrary command to establish the connection to the target host. While-Jis generally preferred now,ProxyCommandoffers ultimate flexibility.
- Example in
~/.ssh/config:
Host internal-db
HostName db-server.internal
User alice
ProxyCommand ssh -W %h:%p bastion.example.com
Now, a simplessh internal-dbwill connect you todb-server.internalvia the bastion, achieving the same result asProxyJumpwith a more concise command.
Your SSH Command Center: Mastering the ~/.ssh/config File
The ~/.ssh/config file is your personal SSH command center. Customizing this plain-text file can save you immense time and effort by defining aliases, specifying ports, associating specific keys, and setting advanced options for different hosts. It streamlines your workflow, making complex commands simple and repeatable.
Every time you type ssh <hostname>, your SSH client first checks this file for a matching Host entry.
- Basic Alias Example:
Host my-dev-server
HostName 192.168.1.100
User devuser
Port 2222
IdentityFile ~/.ssh/id_rsa_dev
Now, instead ofssh -p 2222 -i ~/.ssh/id_rsa_dev devuser@192.168.1.100, you can simply typessh my-dev-server. Much cleaner! - Combining with
ProxyJump:
Host internal-web
HostName 10.0.0.5
User admin
ProxyJump admin@bastion.example.com
IdentityFile ~/.ssh/id_ed25519_internal
With this configuration,ssh internal-webtakes you directly to10.0.0.5through the bastion, using a specific key for that internal server. - Wildcard Host Settings:
You can also apply settings to all hosts or a group of hosts usingHost *orHost *.example.com.
Host *
ServerAliveInterval 60
ServerAliveCountMax 3
Keeps connections from dropping due to inactivity
One Connection, Many Sessions: SSH Multiplexing
Imagine opening dozens of scp or rsync commands, or multiple interactive shell sessions, all to the same remote server. Each time, SSH performs a full handshake—authentication, key exchange, encryption setup. This overhead adds latency. SSH multiplexing solves this by reusing an existing SSH connection (the "master connection") for subsequent sessions to the same host.
- Benefits:
- Speed: Subsequent connections are almost instantaneous.
- Resource Efficiency: Fewer TCP connections and authentication processes.
- Reduced Authentication Prompts: If you use a passphrase, you only enter it once for the master connection.
To enable multiplexing, add these lines to your~/.ssh/config(typically underHost *for global application):
Host *
ControlMaster auto
ControlPath ~/.ssh/control:%h:%p:%r
ControlPersist 5m ControlMaster auto: Tells SSH to try to use an existing master connection. If none exists, it will create one.ControlPath: Specifies the path to the socket file that the master connection creates. SSH uses this file to coordinate subsequent connections.%h,%p, and%rare placeholders for hostname, port, and remote user, ensuring unique sockets per connection.ControlPersist 5m: This is key for convenience. It keeps the master connection (and its associated socket) open for5 minutesafter the last client session using it has closed. This means you can close all your terminal windows, and for 5 minutes, a newssh,scp, orrsynccommand will instantly reuse the dormant connection without re-authenticating.
Bringing Remote Home: Mounting with SSHFS (SSH File System)
SSHFS (SSH File System) allows you to mount a remote directory on your local machine over SSH, making remote files and folders appear as if they are part of your local file system. This is incredibly powerful for development, content management, or any task involving frequent interaction with remote files.
- Benefits:
- Seamless Integration: Open remote project files directly in your local IDE, edit them, and save them—they're updated on the remote server instantly.
- Familiar Tools: Use your local file browser, command-line tools, and scripts on remote files without needing
scporrsyncfor every change. - Simplified Workflows: No more constantly copying files back and forth.
- Installation (example for Debian/Ubuntu):
sudo apt install sshfs(macOS users can install via Homebrew:brew install sshfs). - Example Usage:
- Create a local mount point:
mkdir ~/remote_project - Mount the remote directory:
sshfs user@remote-host:/path/to/remote/directory ~/remote_project - You'll be prompted for your SSH key passphrase. Once authenticated, the contents of
/path/to/remote/directoryonremote-hostwill appear in~/remote_project. - To unmount:
fusermount -u ~/remote_project(Linux) orumount ~/remote_project(macOS).
Fortifying Your Access: Advanced SSH Key Management & Security
Having powerful tools is one thing; using them securely is another. Advanced SSH usage demands sophisticated key management practices to maintain a robust security posture.
The Unbreakable Seal: Passphrases & SSH Agent
While SSH keys are inherently secure, a strong passphrase on your private key adds an essential layer of protection. If your private key file is compromised, it remains useless without its passphrase.
- Strong Passphrases: Aim for 12-15+ characters, mixing cases, numbers, and symbols. Treat it like your most important password – don't reuse it.
- SSH Agent: Constantly typing your passphrase is a hassle. The SSH Agent (a background program) holds your decrypted private keys in memory. You unlock your key with its passphrase just once per agent session, and the agent handles all subsequent authentications.
- Start agent:
eval "$(ssh-agent -s)" - Add key:
ssh-add ~/.ssh/id_rsa(you'll enter the passphrase here). - List loaded keys:
ssh-add -l
Strategic Separation: Different Keys for Different Systems
Using a single SSH key for all your access points (personal projects, work servers, GitHub, critical production systems) is convenient but risky. If that single key is compromised, every system it accesses is vulnerable.
Best Practice: Create separate key pairs for different logical environments.
id_rsa_personalid_ed25519_workid_rsa_githubid_ecdsa_prod-server-group
You can specify which key to use in your~/.ssh/configfile:
Host github.com
User git
IdentityFile ~/.ssh/id_rsa_github
Host work-server-*
IdentityFile ~/.ssh/id_ed25519_work
Host production-backend
HostName 172.16.0.10
User deployer
IdentityFile ~/.ssh/id_ecdsa_prod-server-group
This compartmentalization dramatically limits the blast radius if one key is ever compromised.
Staying Ahead of Threats: Regular Key Rotation
Even with passphrases and separate keys, cryptographic keys shouldn't last forever. Regular key rotation reduces the window of opportunity for attackers who might silently compromise a key.
- Personal Keys: Rotate every 1-2 years.
- Business/Team Keys: Rotate every 6-12 months.
- High-Security/Production Keys: Consider rotation every 3-6 months.
- Immediate Rotation: If a team member leaves, a device is lost, or suspicious activity is detected, rotate all affected keys immediately.
Rotation Process:
- Generate a new key pair (
ssh-keygen). - Add the new public key to all remote systems'
authorized_keysfiles. - Crucially, verify that you can connect successfully with the new key.
- Remove the old public key from all remote
authorized_keysfiles. - Delete the old private and public key files from your local machine.
Locking Down the Gates: Enforcing Key-Based Authentication
The ultimate step in securing your SSH access is to disable password authentication on your servers entirely. This eliminates the largest attack surface for SSH – brute-force password guessing.
On your remote server (requires sudo):
- Edit the SSH daemon configuration:
sudo nano /etc/ssh/sshd_config - Find and set these directives:
PasswordAuthentication no
PubkeyAuthentication yes # This is usually the default
PermitRootLogin prohibit-password # Optional, but good practice - READ THIS CAREFULLY: Before restarting the SSH service, ensure you can successfully connect to the server using your SSH key in a separate terminal window. If you disable passwords and your key isn't working, you will lock yourself out.
- Once verified, restart the SSH service:
sudo systemctl restart sshd(for systemd-based systems like modern Linux)sudo service ssh restart(for older init systems)
When Things Go Sideways: Troubleshooting Common SSH Key Issues
Even the most seasoned pros encounter SSH issues. Here are quick fixes for common problems:
- "Permissions too open" / "Bad permissions":
SSH is very particular about file permissions. Your private key,~/.sshdirectory, andauthorized_keysfile need specific, restrictive permissions. - Your home directory:
chmod 755 ~(orchmod 700 ~if you prefer it more locked down) - The
~/.sshdirectory:chmod 700 ~/.ssh - Your private key:
chmod 600 ~/.ssh/id_rsa(orid_ed25519, etc.) - The
authorized_keysfile:chmod 600 ~/.ssh/authorized_keys(on the remote server) - "Passphrase for key...:" keeps appearing or is forgotten:
If you forgot your passphrase, you'll need to generate a new key pair, update remote systems with the new public key, verify, and then remove the old, unusable keys. If it keeps asking, ensure your SSH agent is running and your key is added (ssh-add). - "Connection refused":
This usually means the SSH service isn't running on the remote server, a firewall is blocking port 22 (or your custom port), or the server IP/hostname is incorrect. Check server status and firewall rules. - "Permission denied (publickey)" / Authentication failures:
This is the most common key-related error. Check: - Is your public key correctly placed in
~/.ssh/authorized_keyson the remote server, and are its permissions600? - Is
PubkeyAuthentication yesin the remote server'ssshd_config? - Are you connecting with the correct
Username? - Are you using the correct private key (e.g., via
ssh -i /path/to/key)? - Is your SSH Agent running and does it have the correct key loaded (
ssh-add -l)? - On the server, check
/var/log/auth.logorjournalctl -u sshdfor specific error messages. - "Host key verification failed":
This happens when the remote server's host key (its unique fingerprint) has changed, perhaps due to a server rebuild or IP address change. Your client detects a mismatch to prevent man-in-the-middle attacks. - If expected: Remove the old host key from your
~/.ssh/known_hostsfile. The error message will often tell you the exact line number to remove, or you can usessh-keygen -R hostname. - If unexpected: Do not proceed. This could indicate a malicious actor trying to intercept your connection. Investigate immediately.
Your Next Steps: A Secure Path Forward
You've now moved beyond the basics, equipped with a powerful arsenal of advanced SSH key concepts and usage patterns. From securely tunneling traffic to intricate network hops, from streamlining your commands with configuration files to dramatically speeding up your workflow with multiplexing, these techniques unlock new levels of efficiency and security for your remote operations.
The core takeaway is simple: SSH keys are foundational for modern, secure remote access. By embracing strong passphrases, strategic key segmentation, regular rotation, and the complete disabling of password authentication, you not only fortify your systems but also lay the groundwork for a more agile, automated, and less error-prone development and operational environment. Don't just understand these concepts; integrate them into your daily workflow. The investment of time now will pay dividends in security, convenience, and peace of mind.